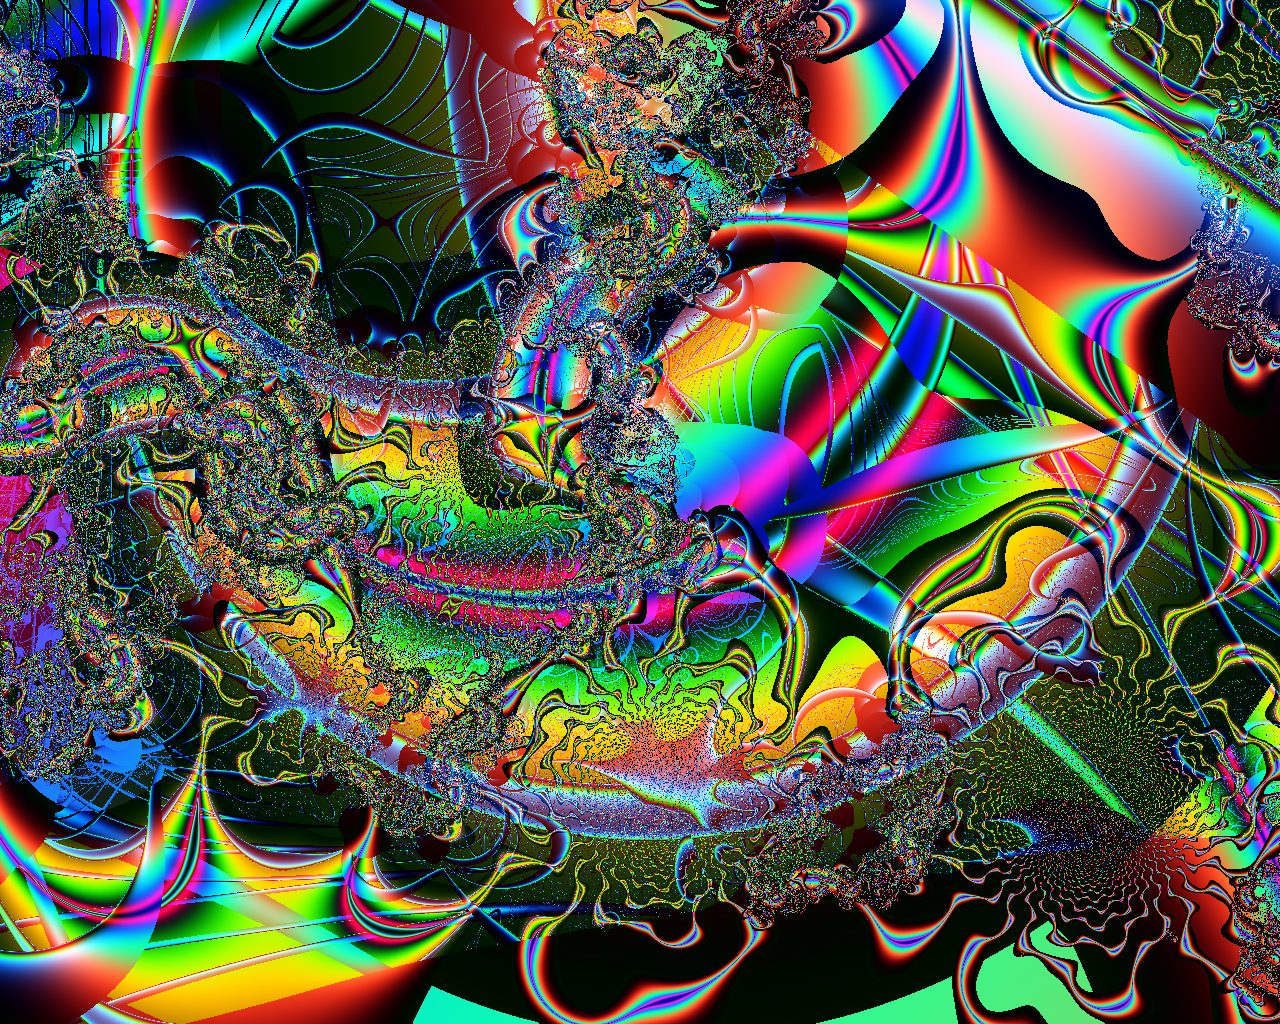
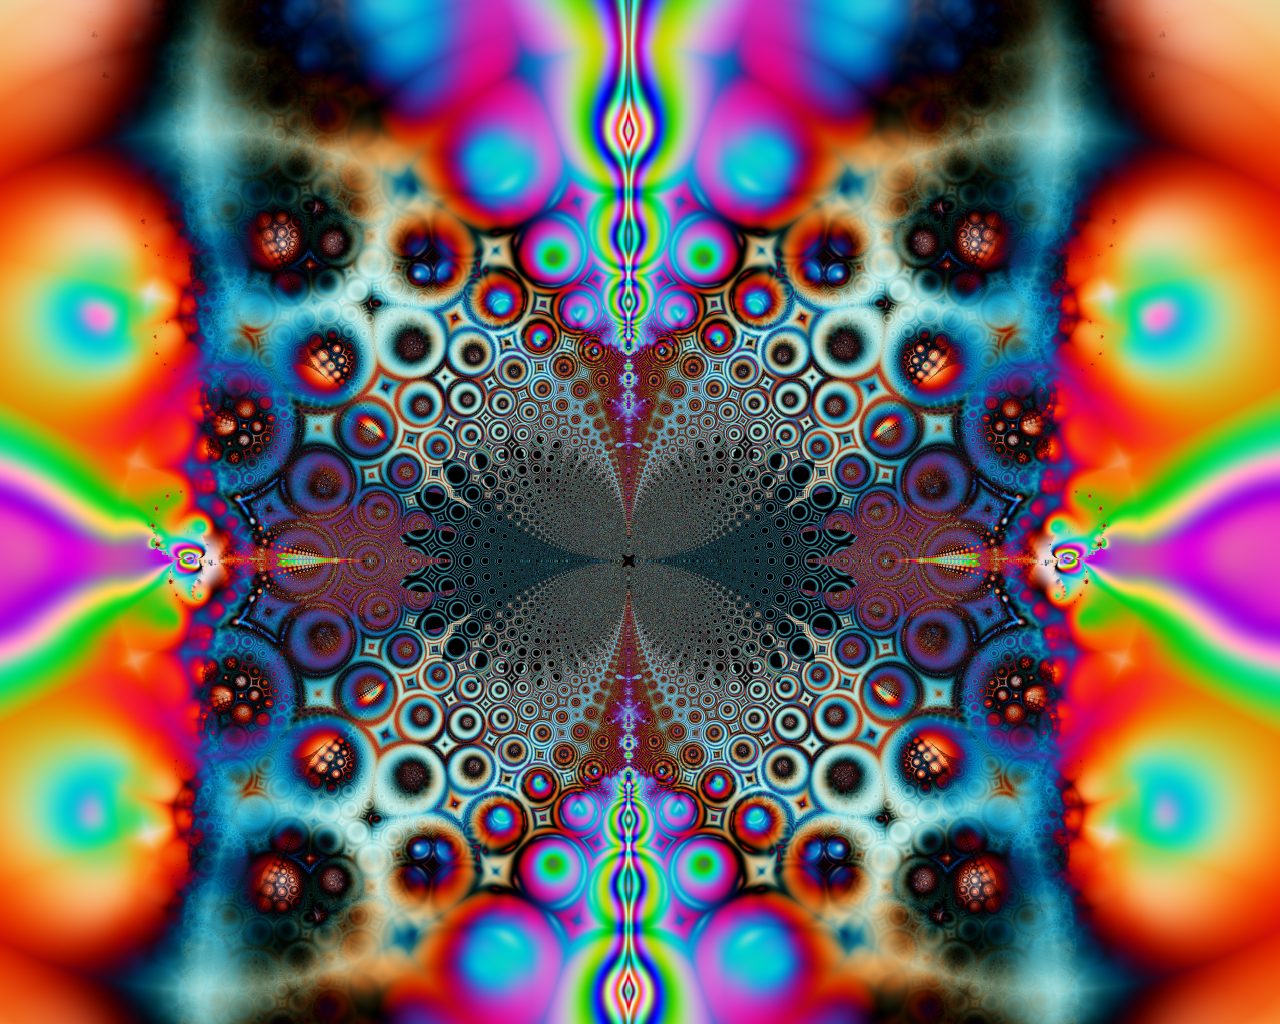
Anti-Aliasing
If you make an image that you really like then I recommend anti-aliasing it, especially if it has a lot of fine detail. In particular, fractals made using Sterling and Sterling2 often look much better after anti-aliasing. Anti-aliasing smooths out the jagged diagonals and makes the fine detail look more coherent. It makes curves smoother by averaging out their trajectories and does dithering, ie interpolates intermediate shades where there may only be sharply distinct colours in the original mage.
To do anti-aliasing, increase the pixel dimensions by a factor of four, ie draw the image as 5120 x 4096 pixels if you want the final image to be 1280 x 1024 pixels. Naturally, this will take 16 times as long as rendering the normal-size image. Once the over-size image has been rendered you need to bring it down to your desired resolution.
Some programs, such as Sterling and Sterling2, have a feature that does this for you. In Sterling do Image -> Anti-Alias 4:1 and save the resulting image. You can do the same thing in any good graphics program, such as Photoshop, where you just hit control-alt-i.
Some people sharpen the image after anti-aliasing, as it can look a little soft, but this is a matter of taste.
You may find that the new image is much smoother and less speckled than the original. Do give this a try at least once, as you may be surprised by the difference. I label my anti-aliased images with the suffix aa. To see what a difference anti-aliasing can make, compare these two pairs of images. Probably the best way to do so is to open each image in its own browser window and then flick between the two using alt-TAB. To do this hold down the shift key as you click on each image.